Project Introduction

It's one thing to memorize surface area and volume formulas and use them to crunch numbers. It is quite another thing to actually USE them to build something.
To truly learn the power of these Geometric formulas and the beauty of the shapes they describe, its best that you use them to actually build a building. As you follow the steps of this project you will enhance your understanding of Geometry tremendously.

Portfolio Requirements

o AAAMath Weekly Practice Problems
o Geometry History Timeline
o Shapely Dimensions Graphic Organizer
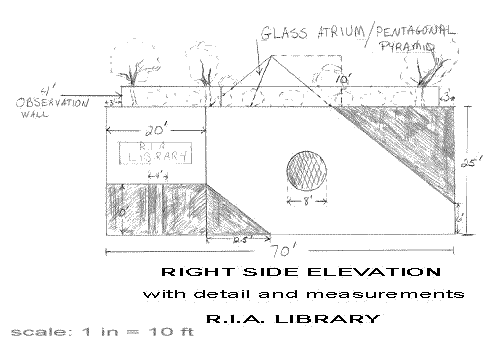
o Building Blueprint
o 3 Dimensional Nets
o Building Model
o City Model - Class
o Architecture Plan Presentation

AAA Math Practice

Each week you must complete practice problems on the AAA Math website in addition to completing the Steps Assigned. Please refer to www.aaamath.com. On the left hand side you will see a list that is sorted by subject. Click on the link assigned and practice until you have completed 5 problems correctly. Print and save the print out to be handed in at the end of the assignment. You may find the weekly assignments in your project packet and in the project documents link to the right.

Task 1 - Due 10/29/2007

1. Shapely Dimensions Sheet
Use the handout to help you.
2. AAAMath.com
Click on the Geometry link located on the left hand side of the page.
Complete the Geometry Facts and Calculations section

* Polygons
* Polygons II
* Classifying Triangles by Angles
* Classifying Triangles by Sides
* Finding the Third Angle of a Triangle
* Finding the Fourth Angle of a Quadrilateral
* Complementary Angles
* Complementary or Supplementary Angles
* Supplementary Angles


3. History of Geometry Timeline
Make a time line that highlights 10 events throughout the history of Geometry beginning 3000 BC and ending in present day.

Task 2 - Due 11/5/2007

1. Architecture 101
Click on this link to view photographs of local architecture.
Select one picture that you like best and describe why in a three paragraph essay.
Paragraph 1 - Why you chose the picture?
Paragraph 2 - What geometric figures and concepts discussed in class do you see in the picture?
Paragraph 3 - What are you going to take from this picture to use in your own building?

2. Blueprint
Choose the zone (residential, commercial or industrial - as discussed in class - that you will be selecting a building from.)
Select the type of building located in that zone.
Draw a blueprint (floor plan) of your building.
3. AAAMath.com

Area
* Area of a Square
* Area of a Rectangle
* Area of a Parallelogram
* Area of a Trapezoid
* Area of a Triangle
* Area of a Circle

Perimeter and Circumference
* Perimeter of a Square
* Perimeter of a Rectangle
* Perimeter of a Parallelogram
* Circumference of a Circle


Task 3 - Due 11/12/2007

1. Complete the Pythagorean Packet.
2. Read the Pythagorean Application Packet
3. Complete the Pythagorean Worksheet
4. AAAMath.com
Surface Area
* Surface Area of a Cube
* Surface Area of a Rectangular Prism
* Surface Area of a Cylinder

Volume
* Volume of a Cube
* Volume of a Rectangular Prism
* Volume of a Triangular Prism
* Volume of a Cone
* Volume of a Cylinder
* Volume of a Sphere
* Volume of a Pyramid
5. Complete the Skills Review Worksheet

Task 4 - Due 11/19/2007

1. Review the Preliminary Sketches Packet
- By now you should have completed the Floor Plan.
Make sure to create a Top Elevation sketch to include a birds eye view of the building and landscaping.
- Complete the Front and Back Elevations
- Complete the Left and Right Side Elevations

2. Complete the Skills Review Worksheet

Task 5 - Due 12/3/2007

1. Refer back to the Preliminary Sketch Packet from last week and begin drawing your nets.

2. Complete the Unit Review Test

Creating your Nets

STEP ONE:

Now its time to transfer your net designs onto posterboard or some other stiff material. Regular paper will not be strong enough. You don't want to destroy the net patterns because you may need to use them again if you make a mistake on one of the posterboard pieces.

So to keep the designs preserved we will transfer them using carbon paper. Carbon paper is available at office supply stores.

NOTE: If you can't get carbon paper, you can always rub a soft pencil over the back of the net pattern lines, and then lay it on the posterboard and transfer. It is a bit messy, but it will work.

Be sure to lay the carbon paper underneath your design with the carbon surface facing the posterboard. Then secure the design and the carbon paper to the posterboard with a bit of tape so that it doesn't move as you draw over the design lines.
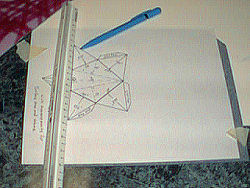
carbon paper underneath original, secured with tape

As you draw over the lines of your net, the carbon will transfer onto the posterboard. It's easy to forget which lines you have already traced, so we recommend using a pen of a different color than the original net. That way you will be able to see where you have drawn.
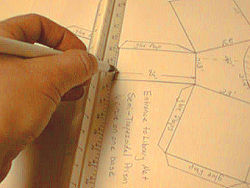
trace over your design in a different color

You don't need to transfer any of the measurements, just the outline and the glue flaps. When you lift the carbon paper, you should see the design has transferred.
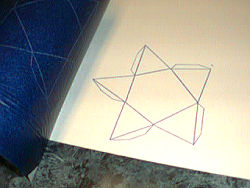
nice transfer and the original is unharmed


Step Two:

Now you may want to decorate the net. Some folks prefer to add the detail while the net is still flat. You can draw on windows and doors, paint on siding or bricks etc.. Or you can wait until the net is built to draw these details.

We decided to paint a sky with clouds onto the "glass" pentagonal pyramid of our library before we cut it out, folded it up, and glued.
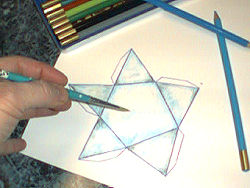
we painted the net before we cut it out and glued it up


STEP THREE:

It's time to FOLD and GLUE.

OKAY READ THIS CAUTION!!!

It's very important that you SCORE all the fold lines with a sharp object like a compass point or the tip of a steak knife before you try to fold. This will cut the top fibers of the posterboard and will give you a clean crisp fold. Be sure to use a ruler as a guide to keep your scoring perfectly straight.
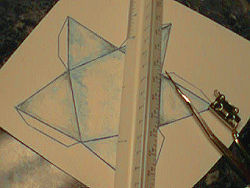
use a sharp object to SCORE all the foldlines

When you're done scoring, fold the figure and do a "dry fit" before you apply any glue. This will tell you if you missed any score lines.
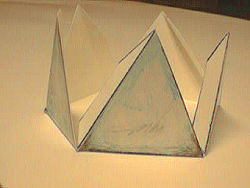
ready to glue

When gluing, always spread your glue using a small piece of scrap posterboard like a knife. Spread it all over the glue flap as if you were buttering a piece of bread. Let the glue set for about 20 seconds before you press the surfaces together. Then hold the joint until the glue grabs enough to stay in place. This will take a few minutes. Glue one flap at a time making sure that they are each holding before moving on to the next. Sometimes the last two flaps will need to be attached at the same time.

Here you can see our finished pyramid.
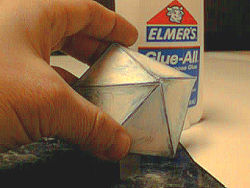
hold those joints

Take your time to carefully transfer, decorate, and build all of your nets.

Creating your nets - Build Up Your Surroundings

Complete your landscape and finishing touches. Check out how this building was done.


Here is the first bottom piece of the library. The entrance is asemi-trapezoidal prism with one curved base.


The second bottom piece was created twice to place on either side of the entrance. This piece is an irregular, convex, quadrilateral, prism.


Here we dry fit the fourth bottom piece and the pentagonal pyramid. This fourth piece is a trapezoidal prism.


We cut a top piece to cover all the seems and lay out the pyramid. The roof vegetation will be glued to this surface as well as the benches and observation wall.


Finally all five bottom pieces of the library are complete.


The next step is to put on the final touches and apply landscaping.


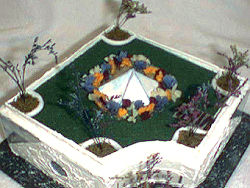
Here is a close-up of the finished, top, roof, garden.


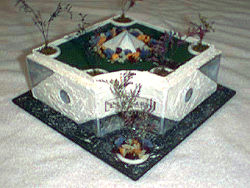
Here we see the finished building from the front.


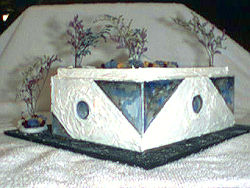
Here is the finished view from the back.


Task 6 - Due 12/10/2007

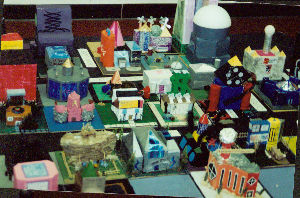
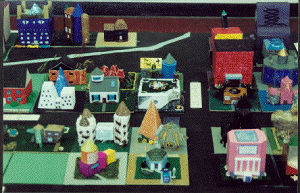
Assemble your City
Each student must combine their building into a class city.

Task 6 - Continued - Due 12/13/2007

You must present this city to the board and explain what architecture qualities make it the optimum city of the future. To be fully prepared for this presentation you must bring with you your Model a well written speech about why your believe your building adds to the city's overall appeal and a well versed presentation with at least 5 visual pieces. For example a power point presentation or a flip chart presentation. Be creative and prepared to discuss the reasons why you chose the design that you did.
No posts.
No posts.